Crazy, but I want to publish this post as it serves as a bit of a record of many of my projects. Its September 6, 2020 and I'm still editing it!!
You might be thinking, why bother? I know, but I love seeing all of the photos of projects and our garden on the blog.
As I looked through 2016, 2017 and 2018 photos, I'm amazed at how much I've forgotten that I've made. Most of the forgotten things are ones that have been given away to friends, etc.
Seems like I was very busy in 2018! Since this post is getting pretty long, I'm going to put the second half of 2018 in another post.
This, below, is the beginning of a scrap busting blanket. With 3 yarns crocheted together, its pretty heavy. I was busy with other projects at the time and I was finding that my hands were hurting from struggling with the larger crochet hook and pulling the 3 threads through. I'm not sure if I will pick it up again and try to work on it. I'll have to see what 2020 brings lol.
**Edited to say that I gave up and decided to gift all of the yarn set aside for this project to some women in the area who were looking for yarn to teach their grandchildren with.


I had, for a long time, wished to make a "temperature blanket" Have you heard of them? You record each day's high temperature and crochet or knit 1 row in the color that represents that day's temp.
I chose Vanna's Choice acrylic yarn for mine in the colors below. I started out ok, but I stopped the end of June I believe. I'll be picking it up some day, as I think it will be a fun blanket to have around. There are temperature records on a few websites that you can access for many, many years. Like your birth year, etc. so I'm not worried about not being able to pick up where I left off and get all the correct temperatures to finish it.


Can you see the change in stitch for every 1st day of the month? I thought that would be a good way to help find each month when looking at the finished blanket.
Those dark purple rows were right after a blizzard we had in January of 2018.

Well - I am editing this post on June 27, 2020 and this Temperature Afghan is still waiting for me to feel like continuing it. Someday I'll pick it up again - really!


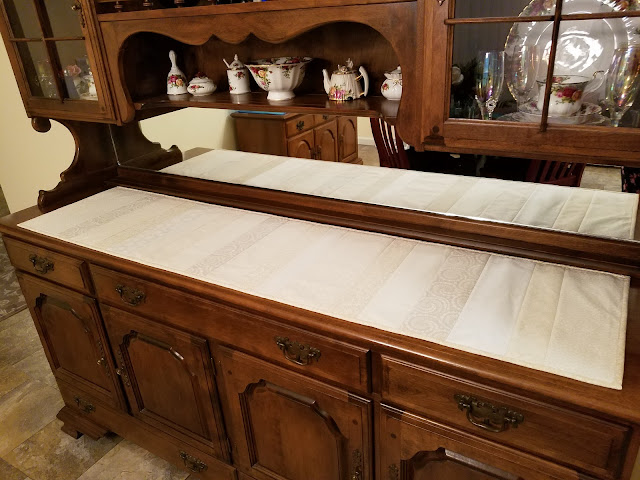


These placemats and matching table runner were also quilt as you go projects.


This knitting project came out very pretty. The yarn was very soft. These are fingerless mitts.


Ricky Timms "Convergence" quilt. I took borrowed a copy of this book from the local library and made this quilt out of Jinny Beyer fabrics that I had bought at her Virginia store.


Another "Fallen Cloud" shawl.

Ah, spring!


We headed down to Florida in the early spring and it was cold on the way

Nice and warm in Florida though...


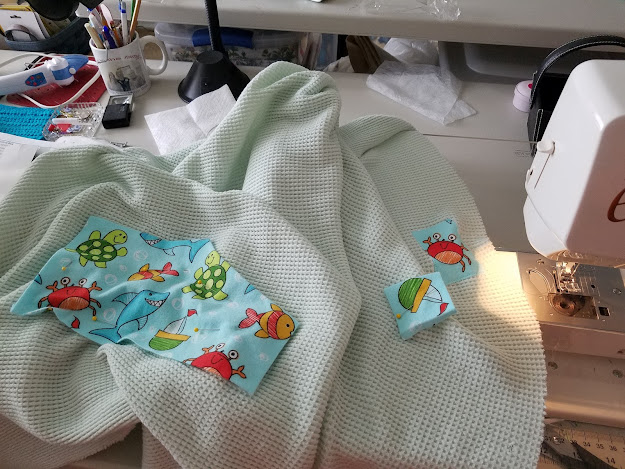
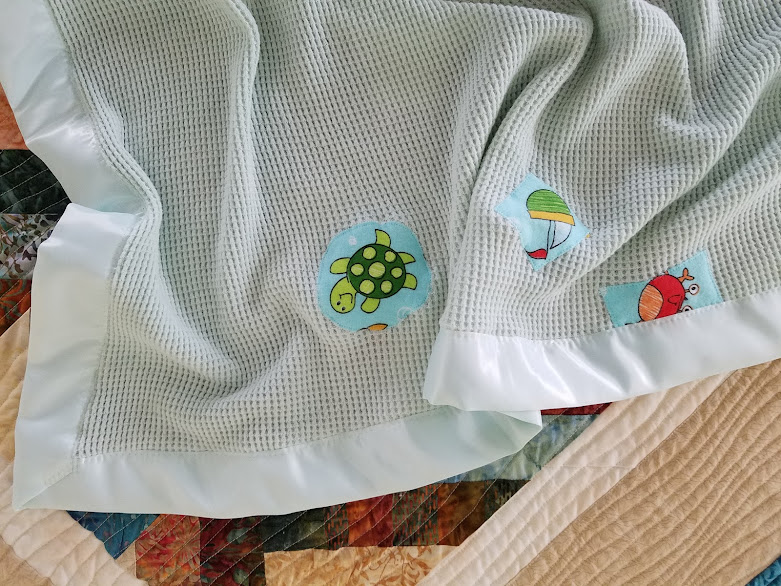
 I found my youngest son's baby blanket and after making some repairs and sewing on a new satin binding I gave it to his baby boy :)


These are from a test of fabric baskets that I did for www.aroundthebobbin.com . Lisa has some great patterns offered on her website.


I made a quilt for my youngest grandson's 2nd birthday.


During the winter of 2018 I worked on finishing "unfinished objects". This was a print that looked like a pieced quilt.


This was another "UFO" that needed to be finished. I had put together this lone star many years ago, just to see if I could do it. The directions were from Quilt in a Day. I then purchased some iron on appliques and added a border. I was so glad to have finished this project.

I tested the Wild at Heart shawl. I loved knitting this shawl and hope to use the pattern again.

I decided one day that I really needed to learn how to use the embroidery function of the sewing machine that my mother had given me back in 2005 or so. Its a Babylock Esante ESE2. This was one of the first items I embroidered with it.

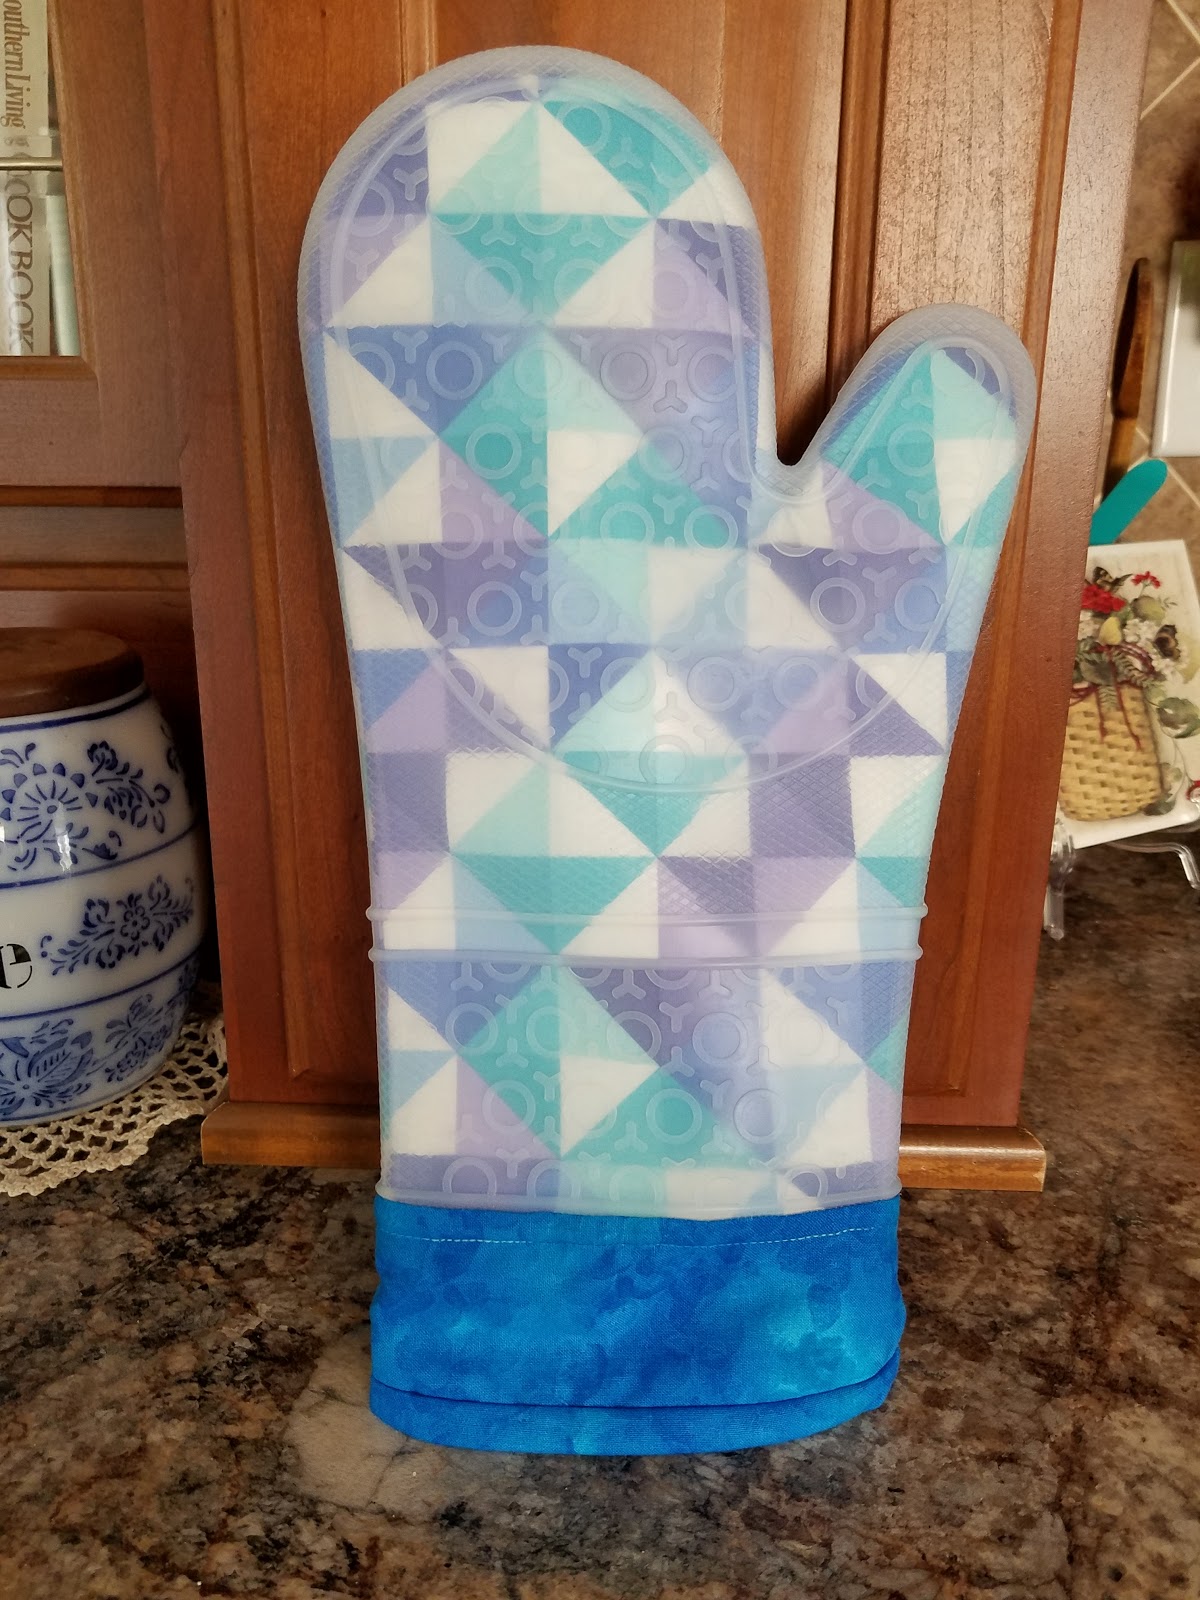
I had the opportunity to test the pattern for this silicone oven mit. I was surprised at how easy it was to sew through silicone. The pattern and silicone mits can be purchased at www.aroundthebobbin.com

You might be thinking, why bother? I know, but I love seeing all of the photos of projects and our garden on the blog.
As I looked through 2016, 2017 and 2018 photos, I'm amazed at how much I've forgotten that I've made. Most of the forgotten things are ones that have been given away to friends, etc.
Seems like I was very busy in 2018! Since this post is getting pretty long, I'm going to put the second half of 2018 in another post.
This, below, is the beginning of a scrap busting blanket. With 3 yarns crocheted together, its pretty heavy. I was busy with other projects at the time and I was finding that my hands were hurting from struggling with the larger crochet hook and pulling the 3 threads through. I'm not sure if I will pick it up again and try to work on it. I'll have to see what 2020 brings lol.
**Edited to say that I gave up and decided to gift all of the yarn set aside for this project to some women in the area who were looking for yarn to teach their grandchildren with.


I had, for a long time, wished to make a "temperature blanket" Have you heard of them? You record each day's high temperature and crochet or knit 1 row in the color that represents that day's temp.
I chose Vanna's Choice acrylic yarn for mine in the colors below. I started out ok, but I stopped the end of June I believe. I'll be picking it up some day, as I think it will be a fun blanket to have around. There are temperature records on a few websites that you can access for many, many years. Like your birth year, etc. so I'm not worried about not being able to pick up where I left off and get all the correct temperatures to finish it.


Can you see the change in stitch for every 1st day of the month? I thought that would be a good way to help find each month when looking at the finished blanket.
Those dark purple rows were right after a blizzard we had in January of 2018.

This shawl I knit was a test project for a designer who lives in Austrailia. The colors look more blue on the screen than the shawl really is. Its actually more blue/green. Its a nice shawl, but not one I'd do again. I think the name was Dresdener.


This is a cathedral window table runner I made - totally on my sewing machine. I followed a Jenny Doan Missouri Star Quilt Co tutorial on Youtube to make this. I put cotton batting between the front and the backing, which I'm a little sorry I did. The runner is heavy - however, it does protect my coffee table really well!


The table runner below was a quilt as you go project. When you are finished adding your top fabrics - the project is already quilted and you just have to trim the edges and put a binding on.


This is a "Fallen Cloud" shawl that I knit. I made at least 3 of these. I absolutely love this design. Its a shame that it gets so boring near the end of making it - the long rows of plain knitting get tiresome.


This is a hat I knit for my grandson, Nathan.

I participated in the testing of a new pattern by Lisa of Around the Bobbin. The casserole holder was a fun project. I used fabric to match the fabric basket which was also a test project I did for Lisa.
I


The instructions for this quilt are amazing and if you follow Ricky's directions and especially his tips, it will come out perfectly. There are very precise instructions for pressing (rather than ironing) the very narrow strips. I have yet to quilt this one because I can't decide how I want to quilt it.


I made 3 of these chubby charmer tote bags. They are HUGE!!


This is the Banana River in Cocoa Beach.

I purchased some yarn at a yarn store in Cocoa, Florida. (Its 2020 as I edit this and I have yet to finish this shawl! I ran out of the raspberry color for the edging and had to go buy something that matched fairly well)


These are from a test of fabric baskets that I did for www.aroundthebobbin.com . Lisa has some great patterns offered on her website.


Carole's scrap dance mysteries are a lot of fun.


And there we have the first half of 2018!
Hopefully I can upload the second half of 2018 within a shorter amount of time than it has taken me to do the first half!
Till then, remember, there's always hope!
Pat